Archive for September, 2010

h1

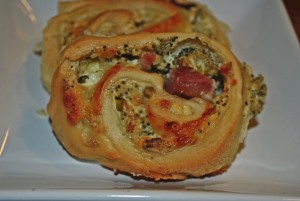
Ham and Broccoli Cheese Spirals

September 28, 2010

I found this recipe a few weeks ago and have been waiting for the weather to cool to try it.  I had spiral ham in the freezer from Easter and an awesome use for the dinner roll recipe.   How perfect was that?

When I told my husband that I was planning on making it, he was lukewarm about it until he ate it. He can’t stop raving about it.

I made it with swiss cheese but I plan to use another cheese next time I make it. 

I’m thinking of Italian Sausage and mozzarella cheese.

This is so easy to make and versatile.  The cheese options are endless.  So are the meat options.

I did make my own bread using the dinner roll recipe.  But you don’t have to.  These make about 18 hearty  rolls.  The rolls freeze well, and can probably cut into quarters for an appetizer.

Ham and Broccoli Cheese Spirals

  • 1 whole Batch Of Roll Dough That Yields About 12 Average-sized Dinner Rolls (or Prepackaged Dough)
  • 16 ounces, weight Cream Cheese, softened
  • 1/2 t Granulated Garlic
  • 1-½ C Finely Chopped Broccoli
  • 1 C Finely Chopped Green Onions
  • 2 C Chopped Deli Ham (or Other Leftover Ham)
  • 2 C Shredded Cheese (whatever cheese you like-the possibilities are endless)
  • 1 C Freshly Grated Parmesan Cheese
  • Follow the recipe for your roll dough until the point where the dough has risen. Punch down the dough and roll the dough out into a large rectangle about 1/2-inch thick.

    In a small bowl, cream together cream cheese and garlic. Add the broccoli and green onion.  Mix well.  Spread the rolled out dough with the cream cheese mixture. Top with the ham, and the cheeses.  Roll the dough up, pinching the seam to seal. Slice the roll into about 1-inch segments. Place the rolls on a lightly greased baking sheet and cover with plastic wrap. (I greased the sheet with olive oil.)  Do not over crowd the sheet.  I suggest that if you do put all the rolls on one sheet, adjust your cooking time.   Let the rolls rise until nearly doubled and then bake at 350 degrees for about 20 minutes, until lightly browned and bubbly.

    Here is the original link.  It’s Mel’s Kitchen Cafe again.  I did mention that she has some great recipes, right?

    h1

    Dinner Rolls

    September 26, 2010

    When I was a girl, my mother made the best raisin bread.  I loved helping her make it, especially because I could eat some of the dough.  I loved the dough until I saw that episode of Emergency where a man had so much unrizen dough that his stomach started to rise.  I finally got that recipe from my mom in the summer and I’m planning to make it as soon as I find cake yeast or feel comfortable with the dry yeast/cake yeast conversion.

    My mother stopped making the bread once we replaced our oven.  We used to have a pink, yes pink, wall mounted oven.  The house was built in the early 60’s and I guess the builder was anticipating how hot light pink was going to be.  Too bad avocado green and yellow became popular instead.  Even in the 70’s I knew the pink wasn’t so cool.  Especially with the fake red brick in the kitchen.

    Any way, the oven was replaced in the 80’s with a drop in.  We lost a ton of cabinet space along with a pilot light.  Ovens these days don’t have them.  That makes it difficult to work with yeast.  Except that the oven I have in the basement is so basic -no window, no internal light and a pilot light.  It’s my best friend while I work with yeast.  It’s also my best friend in the summer on hot days and I want to bake.

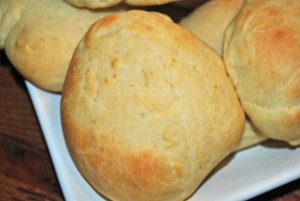
    These dinner rolls are so easy to make.  I mean really easy.  They rise very quickly due to the amount of yeast that is used.

    Mine may not be pretty, but they taste wonderful.  Oh, and they freeze well after baking.

    Dinner Rolls

    • 1 1/2 C warm water (110 degrees F)
    • 1 package (1/4 oz) active dry yeast
    • 2 T Sugar
    • 2 T Vegetable Oil
    • 1 t Salt
    • 4 C Flour, All-Purpose or Bread

    In a large bowl, stir the warm water, yeast and sugar together.  Set aside for about 10 minutes, the mixture will become creamy.

    To the yeast mixture, add the oil, salt and 2 C of the flour.  Stir.  Stir in the remaining flour, 1/2 C at a time, until the dough has pulled away from the sides of the bowl  Turn out the dough onto a lightly floured surface and knead until smooth and elastic, about 8 minutes.  Lightly oil a large bowl, place the dough in the bowl, turn to coat.  Cover with a damp cloth and let rise in a warm place until doubled in volume, about 1 hour.

    Deflate the dough and turn it out onto a lightly floured surface.  Divide the dough into 12-14 equal pieces and form into round balls.  Place a slightly greased baking sheet at least 2 inches apart.  Cover the rolls with a damp cloth or greased saran wrap and let rise until doubled in volume, about 40 minutes. 

    Bake for 12-13 minutes in a preheated 400 degree oven, or until golden brown.

    Makes about a dozen rolls.

    h1

    Cinnamon Cider

    September 24, 2010

    Meeshie and my husband just left for a nature walk with the Girl Scouts.

    The walk will be from 8-9 pm and there will be ‘smores.  I sent them off with this awesome cinnamon cider to keep them warm. 

    This is one of my favorite drinks this time of year.  It’s great for a crowd plus it’s really simple to make.

    Oh-yeah and you can spike it with Captain Morgan’s Spiced Rum or Cinnamon Schnapps.  But it’s so good that you don’t have to if you don’t want to.

    Cinnamon Cider

    • 1 gallon Apple Juice
    • 1 container of Caramel-the size really doesn’t matter just use the caramel you put on ice cream
    • 4-6 Cinnamon Sticks

    Combine all three ingredients into a large pot.  Heat on low until warmed through making sure that you don’t bring the mixture to a boil.  Before serving you can remove the cinnamon sticks, but I usually keep them in.  You can then ladle it into cups or transport it into a pump thermos. 

    Enjoy.

    This is a wonderful companion to the pumpkin donut muffins!

    h1

    Five Cheese Grilled Cheese

    September 23, 2010


    We love grilled cheese.

    Grilled cheese with bacon.

    Grilled cheese with tomato.

    Grilled cheese with tomato and bacon.

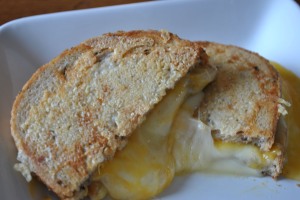
    And this-five cheese grilled cheese.

    We watched The Best Thing I Ever Ate on the Food Network and it inspired this recipe.

    Five Cheese Grilled Cheese

  • 1 whole Slice Of American Cheese
  • 1 whole Slice Of Provolone Cheese
  • 1 whole Slice Of Swiss Cheese
  • 1 whole Slice Of White Cheddar Cheese
  • ½ cups Parmesan Cheese, Grated
  • 2 Tablespoons Butter, Softened
  • 2 whole Slices Of Your Favorite Bread
  • Preheat a skillet. On each slice of bread spread 1 Tablespoon of butter. Take one slice of bread and sprinkle the parmesan cheese on the buttered side. Use your hand to press the cheese into the bread. Place that side down on the prepared skillet. Assemble the cheese slices on top of the bread. Place the remaining slice of bread on the sandwich, butter side up. Sprinkle parmesan cheese on that side and press down with you hand to make sure the cheese adheres to the butter.

    Cook until the cheeses are melted. The parmesan cheese will become nice and brown giving the bread an extra layer of crunch.

    I’ve made this sandwich with rye bread, sourdough and just rustic Italian bread. Just make it with your favorite bread. You can also mix up the inside cheese too. It’s the crusty outside layer of parmesan that makes it so good.

    Serve this sandwich with your favorite soup.

    h1

    Pumpkin Donut Muffins

    September 21, 2010

    I know I’ve mentioned this before but my husband loves donuts.

    Me?  I’m okay with them. 

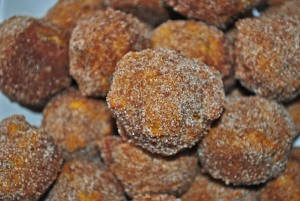
    I saw a recipe for a baked pumpkin donut and thought why can’t I just make it in a muffin tin?  Then I thought why can’t I roll it in cinnamon sugar or better yet some more of the pumpkin spice?

    As a rule I don’t buy donuts and I usually don’t make them.  My husband has no will power when it comes to a donut.  That’s not such a great thing with his diabetes.  And although he usually has issues with the blood sugar dipping, I don’t want to encourage high blood sugar either.  The key is to keep it from dipping in either direction.

    But I love pumpkin.  This time of year I can’t get enough of it.  Pumpkin bread, pumpkin pie, pumpkin squares. 

    And these sweet things.

    Culver’s even has a great pumpkin mixer that we get every year after we go out to the pumpkin patch.

    Pumpkin Donut Muffins

    • 2 1/2 C Flour
    • 3/4 C Brown Sugar
    • 2 t Baking Powder
    • 2 1/2 t Pumpkin Pie Spice
    • 3/4 t Salt
    • 1/2 t Baking Soda
    • 1 1/2 C Canned Pumpkin-A whole can
    • 3 Eggs
    • 1/2 C Butter, softened
    • Spiced Sugar Coating
    • 3/4 C Butter, melted
    • 1 C Sugar
    • 1 T Cinnamon
    • 2 T Pumpkin Pie Spice

    In a medium bowl, combine the flour, brown sugar, baking powder, pumpkin spice, salt and baking soda.

    In a large bowl, combine the pumpkin, eggs, and butter.  Beat until smooth.  Add the flour mixture, beat until well combined.  Spoon the mixture into greased muffin tins close to the top.  Place in a preheated 350 degree oven and bake for 20-25 minutes (15-20 minutes if using the mini tin).  While baking, melt the butter and place in a bowl.  In another bowl combine the sugar and spices.  While the muffins are still slightly warm, dip them in the melted butter and then roll in the sugar mixture.

    This recipe makes about 18 regular muffins.  I actually made some as mini-muffins and some regular. 

    Enjoy this simple and yummy treat.

    Here’s the inspiration for this awesome recipe.

    h1

    Cinnamon Raisin Biscuits

    September 19, 2010

    I made these for breakfast yesterday.  I was looking for something easy and quick, plus I was in the mood for raisins.

    The recipe reminded my of the very berry scones I make.  They are lighter than scones though.  I added some nutmeg to the icing to give it added flavor.

    Meeshie loves it when I have to use a rolling-pin.  She can’t get her apron on fast enough to help me.

    Cinnamon Raisin Biscuits 

  • 2 C All-purpose Flour
  • 3 t Baking Powder
  • 2 T Sugar
  • 1-½ t Ground Cinnamon
  • ½ t Salt
  • ½ C Shortening
  • ⅔ C Milk
  • ½ C Raisins
  • _____
  • FOR THE ICING:
  • 1 C Confectioner’s Sugar
  • 5 t Milk
  • ¾ t Vanilla Extract or Almond Extract
  • A pinch of Nutmeg
  • In a large bowl combine flour, baking powder, sugar, cinnamon and salt. Cut in shortening till you have a crumbly appearance. Stir in milk and raisins and mix until just combined.  (I used my hands.)

    Turn dough onto floured surface and knead about 2 minutes. Using a floured rolling-pin, roll to 1/2 inch thickness. Cut with a floured 2 inch biscuit cutter.

    Place on an ungreased baking sheet in a preheated 450F oven for 12- 15 minutes or until golden.

    While the biscuits are in the oven, mix the icing ingredients in a small bowl until well combined. Drizzle biscuits with icing and enjoy.

    Makes 2 dozen biscuits.

    Here’s the original recipe.

    This one will be so easy to make during the week.

    h1

    French Toast Strata

    September 16, 2010

    Before I was married I discovered this recipe. 

    It brings together two of my favorite things.  French toast and make a head casseroles. 

    I made it the night before my wedding to serve to the bridal party.  I’ve made it for Easter.  I’ve brought it to friend’s houses.  I’ve brought it to work.  I’ve changed it throughout the years to make it better.  I’ve added fruit and I’ve taken fruit away.

    The great thing about this recipe is that you make it however you like.  It’s very versatile. 

    You can use whatever bread you like, but good cinnamon or raisin bread works the best.  I’ve actually even made this with leftover cinnamon rolls. 

    French Toast Strata

  • 8 slices Bread, Cinnamon Or Raisin
  • ½ C Raisins, Optional
  • 8 ounces, weight Cream Cheese, softened
  • 3 whole Eggs
  • 1-½ C Half-and-half
  • ½ C Maple Syrup
  • 1 t Vanilla
  • 1 t Cinnamon
  • ¼ t Nutmeg
  • Topping:
  • 2 T Sugar
  • 1 t Cinnamon
  • Cut the bread into 3/4 inch cubes. Spray an 11×7 dish with cooking spray. Place the bread in the prepared dish. Sprinkle the raisins on top of the bread.

    Cream the cream cheese and add the eggs one at a time. Add the half and half, syrup, vanilla, cinnamon and nutmeg. Pour this mixture over the bread.

    Mix the sugar and cinnamon together and sprinkle on top of the bread mixture. Cover and refrigerate at least 4 hours or overnight.

    Preheat the oven to 350 degrees and bake for 45-50 minutes until firm.

    Sprinkle with powdered sugar and serve with syrup, if desired.

    I actually love to make this dish with bread from this site.  If I use the raisin bread, I don’t add the raisins.  I’ve also added apple pie filling.  Like I keep saying, the possibilities for this recipe are endless. 

    This makes about 8 generous servings.

    h1

    Strawberry Explosion

    September 15, 2010

    Meeshie loves Strawberry Quick.

    She sometimes has it with her breakfast. 

    This morning I cam into the kitchen about 5 minutes before we needed to leave to discover Strawberry Quick had exploded all over the floor.  Literally all over my kitchen floor.  In some spots it was in 1/4 inch mounds.  My feet were more than sticking to the floor.  They were shellacked there.

    Meeshie had tried to clean up what had spilt on the floor by using up all the paper towels in the kitchen and wetting everyone of them.  Instead of vacuuming up the mess,  she was able to make a pink gluelike substance and spread it all over the kitchen.

    I almost started to cry.  Any mom that has to get out the door to be somewhere by a certain time every morning knows that you’ve got your departure timed down to a science and any deviation from that is a catastrophe.

    I have a nice size kitchen.  It’s one of the reasons why I love this house so much.  The floor in the kitchen is hardwood.

    I don’t own a mop.  I feel the only efficient way to clean a floor is on hands and knees. 

    Vader wasn’t interested in licking the floor.  It was probably too much work for him.

    I couldn’t leave the mess the way it was all day.  I could get ants.  Plus I just couldn’t leave that mess.

    I cleaned the floor as best as I could.

    Mom, where are your pants?

    We left the house and the floor was still sticky.  But at least it had been downsized to sticky.

    I just finished cleaning the floor again when I got home.

    I miss the toddler stage.

    h1

    Chicken and Dumplings

    September 14, 2010

    I saw a Triple D show a few weeks ago where they made chicken and dumplings.  It looked so good, but it was still so hot here.

    I told my husband that as soon as the weather was cooler, I would make some.  I had some leftover chicken in the freezer from when we made beer can chicken.  I had planned to make chicken pot pie with it.  We love chicken pot pie.

    But I had chicken and dumplings on my mind and I couldn’t shake it.  You know what I mean.  You see something and then you have a taste for it and nothing will appease that craving until you’ve had it.  That’s how I was with the chicken and dumplings.  There’s a reason why they call it comfort food.

    I was a little nervous though, Meeshie doesn’t do soup.  And although I don’t think that chicken and dumplings is soup, I’m not eight. 

    She ate it and enjoyed it.  That made me happy.  It wouldn’t stop me from making it but I hate the stress of forcing her to eat something. 

    I may make a lot of things for dinner, but I’m not a restaurant.  I make it and she has to eat it.  So if I make something that my husband and I love and she just tolerates we can have some tension. 

    Chicken and Dumplings

    • 2 C Flour
    • 1/2 t Baking Powder
    • 1/2 t Kosher Salt
    • 4 T Butter, divided
    • 1 C Half and Half (or milk)
    • 1/2 Onion, diced
    • 3 Celery stalks, diced
    • 3 Carrots, diced
    • 3 Quarts Chicken Broth
    • 3 C Cooked Chicken
    • 1/2 C Peas (optional)

    In a large pot, melt 2 T butter and add diced onion, celery and carrots.  While the vegetables are sauteing prepare the dumplings.  In a large bowl, combine the flour, baking powder and salt.  Cut in 2 T butter into the dry ingredients with a pastry cutter.  Slowly stir in the half and half (or milk).  Mix by hand until the dough forms a sticky ball.  You may not use all of the half and half (or milk).  Heavily flour your work surface and rolling-pin.  Roll out the dough to about 1/8- 1/4 inch thick.  I like mine thinner, but you don’t have to go too thin.  The thinner they are the harder it is to get them off your work surface.  Using a sharp knife, cut the dumplings into squares, about 2×2 inches.  They don’t have to be exact.  Place them on a floured plate and continue to flour them between layers.

    Add the broth to the pot with the vegetables.  Bring the pot to a boil.  Drop the dumplings into the pot one at a time.  Make sure to stir as you add them.  Once all the dumplings are in the pot you can add the flour from the plate.  The flour thickens the broth, so if you don’t want the broth too thick you don’t have to add the remaining flour.  We like our broth thick, so we add it.  Cook the dumplings for about 15-20 minutes or until they no longer taste doughy.  Add the cooked chicken and the peas and simmer for another 10 minutes. 

    Add salt and pepper to taste.

    Enjoy an awesome comfort food. 

    This makes about 8-10 servings.

    h1

    Salted Caramel Chocolate Squares

    September 12, 2010

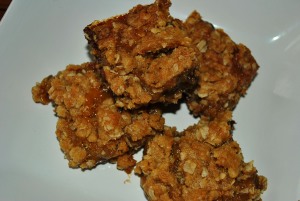
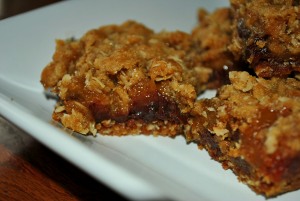
    These should actually be called salted caramel chocolate heaven.

    These are so heavenly.

    Salty and sweet.  Right up my alley.  Remember this post?

    And so easy.  I had almost all the ingredients on hand except for the caramel.  This time of year I do like to have caramel on hand to make various treats.

    I really love caramel.  If given a choice between caramel and chocolate, I would hands down pick caramel.  No question. 

    Look at how this looks.  Really, the salt on top of the caramel and the top are a great touch.

    So so good.

    Seriously.

    Salted Caramel Chocolate Squares

    • 1 1/2 C Flour
    • 1 1/2 C Quick Cooking Oats
    • 1 1/4 C Brown Sugar, firmly packed
    • 1 C Butter, melted
    • 1/2 t Cinnamon
    • 1 t Baking Soda
    • 19 oz (1 jar) Caramel topping
    • 6 T Flour
    • 1 1/4 C Semi-Sweet Chocolate Chips
    • Coarse Kosher Salt or Sea Salt

    Preheat the oven to 350 degrees.  Grease a 9×13 glass baking dish with cooking spray. 

    Combine the flour, oats, sugar, butter, cinnamon and baking soda in a large mixing bowl.  Press half of the mixture into the baking dish and bake for 10 minutes.

    Pour the caramel topping into a medium-sized bowl and stir in the flour.

    Pull the baking dish from the oven, sprinkle the chocolate chips over the warm crust.  Pour the caramel topping mixture on top of the chocolate chips, spreading as necessary.  Sprinkle the coarse salt over the caramel mixture.  Crumble the rest of the crust mixture over the caramel topping and sprinkle with additional salt.  Bake for another 20 minutes.

    Remove from the oven and sprinkle an additional pinch of salt on top of the crust. 

    Cool completely and cut into squares.

    Here’s the original recipe.  Aren’t her helpers beautiful?  I too mixed this by hand.  Another reason to love this recipe.  Less clean up!